How to Make A Macro Panorama Photo
Making A Macro Panorama Photo Of A Piece Of Wood To Count Tree Rings
My dad is a forester by background and loves looking at wood and counting growth rings etc. This study of counting tree rings is called Dendrochronology. The other day I saw that he had a piece of Eastern Red Cedar that he found on the side of a cliff in Iowa and was trying to count the growth rings on it. The problem was that the rings were so closely spaced together he had a hard time counting them, even with a magnifying glass. He took the wood over to Staples and asked them to enlarge the image 5x but they didn't do such a good job and he still couldn't count the rings. I happened to have my photography gear laying out on the dining room table and thought that I would help him out. I decided to make a macro panorama photo and count the rings in photoshop. Here is how I did it:

Macro Panorama Gear
- Canon 6D
- Canon 100mm f/2.8
- Ring Flash (It was attached but I didn't use it)
- Gitzo Carbon Fiber Tripod
- EOS Utility 2
- Mac Book Pro
- Autopano Giga
Setting up
I put all the gear together and set it up on the dining room table. I wanted to get the maximum magnification possible so I moved the pice of wood as close to the lens as possible using book and a box of ammunition.
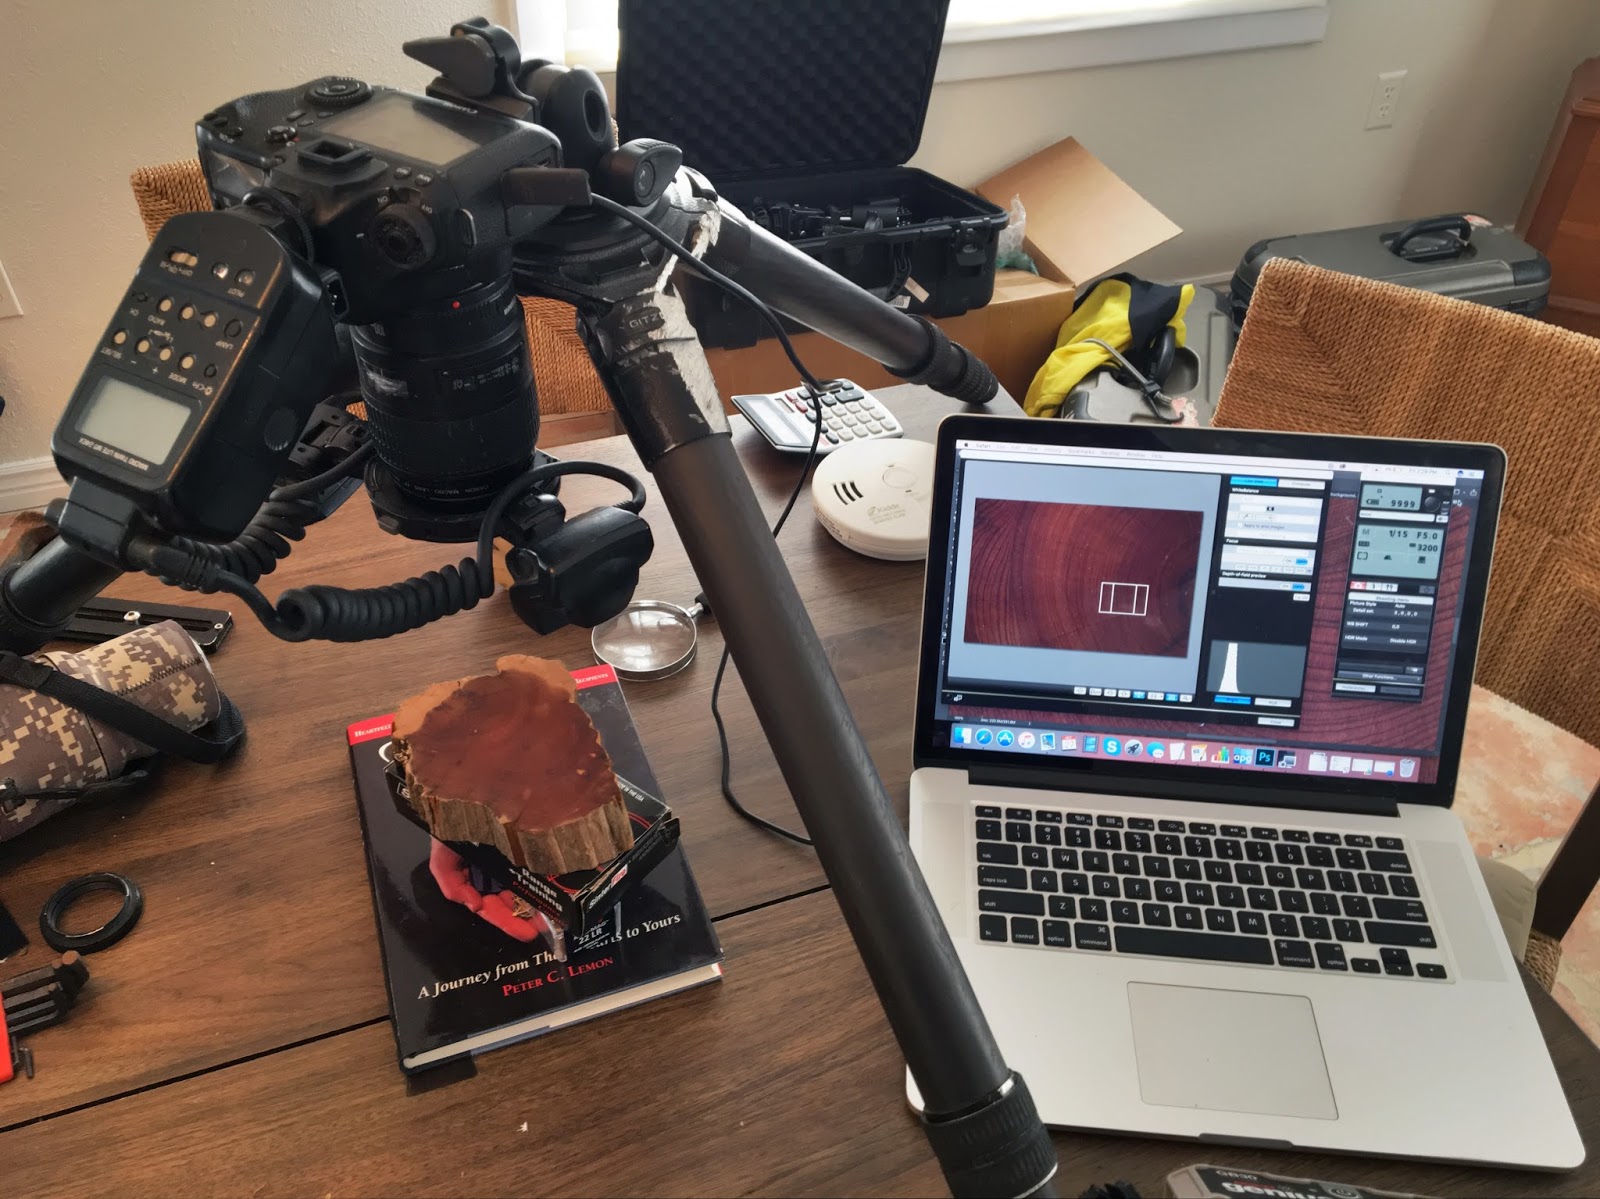 One of the problems that I came across was that the piece of wood wasn't totally level to the camera lens. This meant that some of areas of the photo were out of focus. To fix this I simply used put a piece of paper towel under the wood and used a small level to make sure that everything was straight and level.
 Remote Live View Shooting
I then ran a cable from the camera and plugged it into the computer and opened up EOS Utility 2.This made things a lot easier for a bunch of reasons:
- Didn't have to jump up on the table to look through the viewfinder while focusing. I clicked on the live view zoom button and so I could zoom in and get perfect focus on the camera.
- Wouldn't be shaking the camera while depressing the shutter release. This is really important. Since I wouldn't be touching the camera while the picture was being taken I could use a longer exposure time and use natural light which I think makes the picture look better.
- Using live view made it a lot easier to slide the piece of wood around and take the multiple photos that I needed to make the pano.
- Pictures would be transferred directly to the computer where I could instantly examine them at full resolution as well as do practice stitches to make sure that I took pictures of the entire piece of wood.


Camera Settings

- ISO: 3200 - I used a high ISO because it was a little dark in the dining room.
- Aperture: f/5.6 - I tried to stop down the aperture a little bit so I could get a little bit of depth of field so everything would be in focus.
- Shutter Speed: 1/5 - This just happens to be where the shutter speed wound up based on the tow previous settings. The exposure is a little long but I was triggering the camera via the computer so camera shake wasn't an issue.
 Imaging Technique

To get the shots required for the pano I would take a picture then watch the screen while I slid the piece of wood to a different position, then take another shot. I was careful to leave about a 20%-30% overlap between images so the image stitching software would have something to "grab onto" and make it easier for it to match up images during the stitching process.
 I took pictures around the outside of the wood first so I was sure to get the entire border then went through and took pictures of the interior portions of the wood. Between shots I would zoom in and refocus the camera to make sure that focus was perfect. I took 44 pictures in total.
 Macro Panorama Stitching
I use a program called AutoPano Giga to stitch the image. It's a super simple program to use.
- Selected the images that I wanted to use and imported them into Autopano
- Clicked the "detect" button. This does a rough stitch and render of the image and displays it in the panorama edit window. It's interesting to note that the panorama stitching software stretches, rotates and translates the images to look for a match.
- I then clicked the gear icon and made sure that the final size was going to be at 100% resolution. The final size of the image was 21754 px wide at 300dpi. This converts to 226 inches which equals 18.8 feet (5.7meters) wide, which is a pretty big size and way better than what my dad had done at staples.
- All I did then was click render and let the program do its thing. It took around 10 min for it to stitch the image together.

Editing The Pano In Photoshop
- Once the pano was done being stitched I opened the .jpg in Photoshop.
- I duplicated the image then zoomed in and used the paintbrush to make marks on each ring in the wood while I counted. Every time I got to 100 I would use the text tool to write the number on the wood.
- The piece of wood turned out to be 274 years old! My dad said that he collected the piece of wood about 20 years ago and he estimates that it was dead for around 20 years before then. This means that the wood started growing around 1703AD!! Which is when Thomas Clapp, the first president of Yale University was born. Thats kind of interesting because thats where my dad went to school for his forestry degree.
- After I got done counting I made a new document that had a white background and pasted the image onto it. I then erased the background that contained out of focus parts of the book and table leaving just the piece of wood itself.
- My dad said that he wanted to print it out poster size and hang it up so I used the crop tool to resize the image to 24"x36" which is a standard poster size.
- I uploaded the image to Dropbox and sent it to my friends at PostNet so they could print it out.

 Over all my dad was really happy with the image and called all his friends to tell them about it. I think that the image came out looking pretty nice too, especially since I didn't do any levels adjustments or sharpening adjustments to the image. I also used a .jpg instead of a .tiff which ever so slightly reduces the image quality but it didn't seem to effect the image very much.
You can see the final image here: Macro Wood Panorama

If you have any questions or comments about how I made the image just drop me a line and I will be sure to get back to you. - Jeff


Comments
Post a Comment